Gardening guides
How to grow the unkillable garden
Janet Luke

[This story first appeared in the Dec 2014/Jan 2015 issue of Green Ideas magazine.]
Yes, we probably would all love a garden that would never kneel to our neglect or ignorance. Unfortunately, unless you love the look of rock gardens full of gnomes, you are going to be dealing with living organisms that need a little care.
However, gardens can become almost unkillable with a bit of careful foresight and planning. Indeed if you are a busy person with little desire to toil away in the garden every weekend, this may be exactly what you need in your outdoor space. Just because you have a knack for killing plants, doesn’t mean you should smother every inch of your yard in concrete or decking!
So here are some simple ways of creating an (almost) unkillable garden.
Back your winners (and their friends)
If you’re making changes to an established garden take some time to look around and observe the plants. Which look best? Do they have a strong growth pattern and are their leaves healthy looking? There is a good chance that these plant varieties are well-adapted to your particular ecosystem. They have become established and will not require many inputs from you. If you have new areas of your garden that require planting then take some of these plants as cuttings to your friendly garden centre and ask the staff to help you choose related varieties. These tried-and-true plants will not require any mollycoddling from you once established.
Plant for your conditions
If you put the wrong plant in the wrong place you’ll be constantly fighting to keep it alive. The best way to make your garden as unkillable as possible is to plant for the conditions you have – not the conditions you wish you had. So take some time to assess the growing conditions of your patch. Look at where the sunny and shady spots are in the garden. Take note of the prevailing wind. Are there any particular boggy patches or dry areas? Dig a 30cm deep hole with a spade and look at the soil. Is it clay-like? Is it rich and dark? Is it sandy? Armed with all this local information you can now go to the plant centre and match up the plants you like the look of with the growing conditions you are faced with. I know it sounds obvious but spend some time reading the information on the swing tag of any plant you like. This will give you important information on the shade, water, sun, wind and soil conditions this particular plant requires. Don’t forget that the garden centre staff are also there to help you make these informed purchases.
Water is life
Many gardens die from water-neglect – so to make your garden as unkillable as possible, you need to make it easy for yourself. One of the best things you can do when laying down a garden is taking the time to install a watering system. A simple length of leaky hose around the garden beds will do, or alternatively go for the Rolls Royce sprinkler system with pop up sprinklers and automatic timers. Remember, the less ongoing effort it requires, the less likely you are to accidentally dry your garden to death later down the track. A range of timers and watering systems can be found online at www.hozelock.co.nz.
If you’re starting new plants off remember that the faster they can get good roots established, the more resilient they will be. If your soil is high in clay or very sandy, a generous layer of compost over the area prior to planting will make all the difference in getting those new plants quickly established. Once planted, a thick layer of mulch, such as pea hay or bark chips will make all the difference is conserving water and protecting delicate new roots.
Try these (almost) unkillable plants
Flowering plants
- Calendula
- Salvia
- Lavender
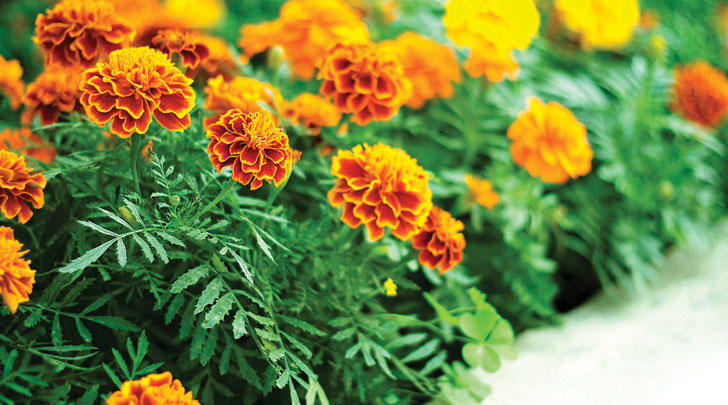
- Marigold
- Sunflower
- Daylily
- Gazania
- Euphobia
- Echium
- Red Hot poker
- Yarrow
- Sedum
Natives
- Muhlenbeckia
- Flax
- Libertia
- Carex
- Coprosma
- Astelia
- Pittosporum
- Hebe
Groundcovers
- Thyme
- Prostrate rosemary
- Prostrate juniper
- Lambs ear
- Creeping jenny
- Sedum sarmentosum
Edibles
- Globe artichoke
- Jerusalem artichoke
- Leeks
- Mint
- Rosemary
- Oregano
- Beetroot
- Silver beet
- Parsley
- Miners’ lettuce (claytonia)
- Garlic
- Rhubarb
- Raspberries and blackberries

How to grow the unkillable artichoke
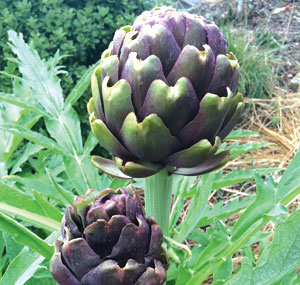
Globe artichokes are a great unkillable plant for the garden, with a lot to offer. Their arching silver-grey leaves create a strong architectural element in any designer garden year round; the unopened flower is a wonderful edible treat; and when the giant purple thistle-like flowers are left to unfurl they are loved by bees and butterflies. Even if you don’t like eating artichokes you can cut the unopened buds and create wonderful long-lasting flower arrangements.
Plant artichokes in full sun. They prefer well-drained soil with some compost added. Each plant requires around 1m2 of space to develop. You can start from seeds or buy seedlings in the herb section at most garden centres. If a friend grows these plants you may be able to take some small side sucker plants to get yours started for free. Each plant will live for around six years but are most productive in the first four.
The three most common types grown in Kiwi gardens are:
- Purple globe – this is an heirloom variety with purple buds. They can be eaten raw when young. I grow this type.
- Green globe – this variety grows large green globe-shaped buds.
- Imperial star – this is very fast growing and will grow from seed to produce a good harvest in the first year.
How to harvest
From the second year of growth each plant will produce many flower buds. The edible part is the unopened flower bud; harvest it when it is tight and around the size of your fist. Flowers are produced from spring through summer. Once harvested, eat as soon as possible.
The bud is usually boiled in salted water with lemon juice for around 20-30 minutes. I like to eat mine with copious amounts of garlic butter!
At the end of summer the leaves will start to wilt and die back. I pull these leaves off by hand from the base of the plant and use them as mulch. If you live in an area where it can snow during winter I recommend mulching the base of the plant thickly with straw. The following spring, baby plants will be produced around the base of the parent plant.
How to eat...
Baked artichokes with breadcrumbs and parmesan
Serve warm on its own, or alongside roasted meats or fish. (Serves 2)
- 1 cup dry breadcrumbs
- 1 handful grated Parmesan cheese
- 2 tablespoons freshly chopped parsley
- 2 tablespoons olive oil
- salt and pepper to taste
- lemon juice
- 2 cloves garlic
- 2 artichokes
Step 1 Heat oven to 190°C. Wash the freshly cut artichokes with cold water. Cut off the stem and remove the sharp prickly lower leaves.
Step 2 Cut the artichoke in half and with a spoon, scrape out the fuzzy part (the choke) from the middle of the bud. Discard.
Step 3 Combine all remaining ingredients and season to taste. Pack the mixture into the middle of the artichoke.
Step 4 Place on a baking tray and drizzle with some olive oil. Bake for 25 minutes or until golden. To eat the artichokes, pull the leaves and scrape the soft base of the leaf with your teeth, then eat the rest.
